


Table of contents
- Prerequisites
- Background
- Basic procedure
- Programs we need to install
- Installing our local certificate on Windows
- Creating our MSI installer
- JavaFX files
- Settings for PackageManager
- Testing our MSI
- Microsoft Partner Portal
- Creating an MSIX Package with the MSIX Packaging Tool
- Starting the MSIX Packaging Tool
- Creating a new MSIX Package
- Testing our MSIX Package
- Windows App Certification Kit
- Converting our "local" MSIX to one compatible with the Windows Store.
Certifying Windows programs independently has not only become a costly endeavour but also significantly more complex, as you either require a hardware token (USB Stick) or must utilize one of the few pricey cloud providers.
The Windows Store serves as an alternative. Here, Microsoft signs the apps themselves, so you only need to cover the one-time cost for developer access. The Windows Store also offers the benefit of managing updates, eliminating the need for developers to create their routines. Furthermore, compared to the Apple Store, Microsoft is considerably more lenient regarding the functional and design requirements of an app.
Prerequisites
In this tutorial, we assume that you already have a functional Windows .exe file generated from your JavaFX program. This can typically be achieved using tools like jPackage on a local computer or through GitHub Actions. Please note that this guide will not cover these steps.
Background
The easiest way to get an application into the Windows Store is by creating a so-called MSIX installation package.
You can think of MSIX as taking a snapshot of the system in its initial state. After installing your software, the MSIX package analyzes all changes and then, at the end of this process, creates its installation program.
This presents several challenges:
Ideally, not much should be installed on the computer, preferably nothing at all. Virtual machines are ideal for this purpose.
Our .exe file alone doesn't help us. We still need to create an installer. The current WiX installer created by jPackage has problems interacting with the MSIX package, so we will use another tool: MasterPackager.
We'll use the free version of MasterPackager to create a classic "MSI" installer. Although "MSI" is no longer officially supported by Microsoft, it serves our purposes since we only need a method to install our files and create "Desktop" and "Program folder" icons and shortcuts. This is enough to provide the MSIX Packaging Tool with all the necessary information.
Basic procedure
Before we finally begin, it is likely beneficial to outline the basic procedure.
First, we will create an MSI installer.
Next, we will launch the MSIX Packaging Tool, which will analyze our MSI installation.
Following that, we will test the generated MSIX application on the local computer.
If everything functions properly, we will fine-tune the MSIX package to ensure the Windows Store accepts our submission.
Item 3 presents its challenge: to test our package, it must be signed even on the local machine. However, the good news is that a self-signed certificate will suffice.
Programs we need to install
Windows 10/11 OS with admin rights
A Microsoft Developer account with
MSIX Hero is like a Swiss Army Knife (even though the software is German). In this tutorial, it will help us generate our certificate, but it can do much more. I suggest taking a closer look at it, as it is very powerful. For this tutorial, we only need the functionality of generating our certificate.
Installing our local certificate on Windows
For people not familiar with the process of generating and installing certificates MSIX Hero will help us. Launch the app and click on "Tools" and then "Create self-signed certificate".

Follow the procedure and save your certificate. In my case, the certificates are stored in the Documents/Certificates folder, and they appear as follows:

In the next step, you need to double-click and install your certificate so that Windows 10/11 trusts it. If you skip this step, the signing of your MSIX package will work, but you won't be able to run the installation locally. In other words, if the MSIX package you created doesn't run, it means you made a mistake when installing your certificate.
Creating our MSI installer
JavaFX files
In my case, my JavaFX app looks as follows:

A double click on teccCsvConverter.exe will open the app. Both folders app and runtime contain the binaries. the teccCsvConverter.ico is a 256x256 picture of my app logo. That's what jPackage generates for me, besides an installer, which we do ignore here.
We are interested in the parent folder teccCsvConverter for the next steps.
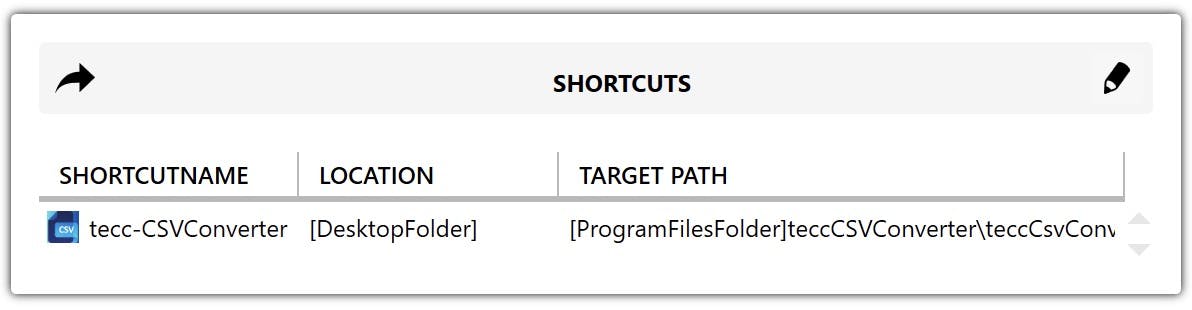
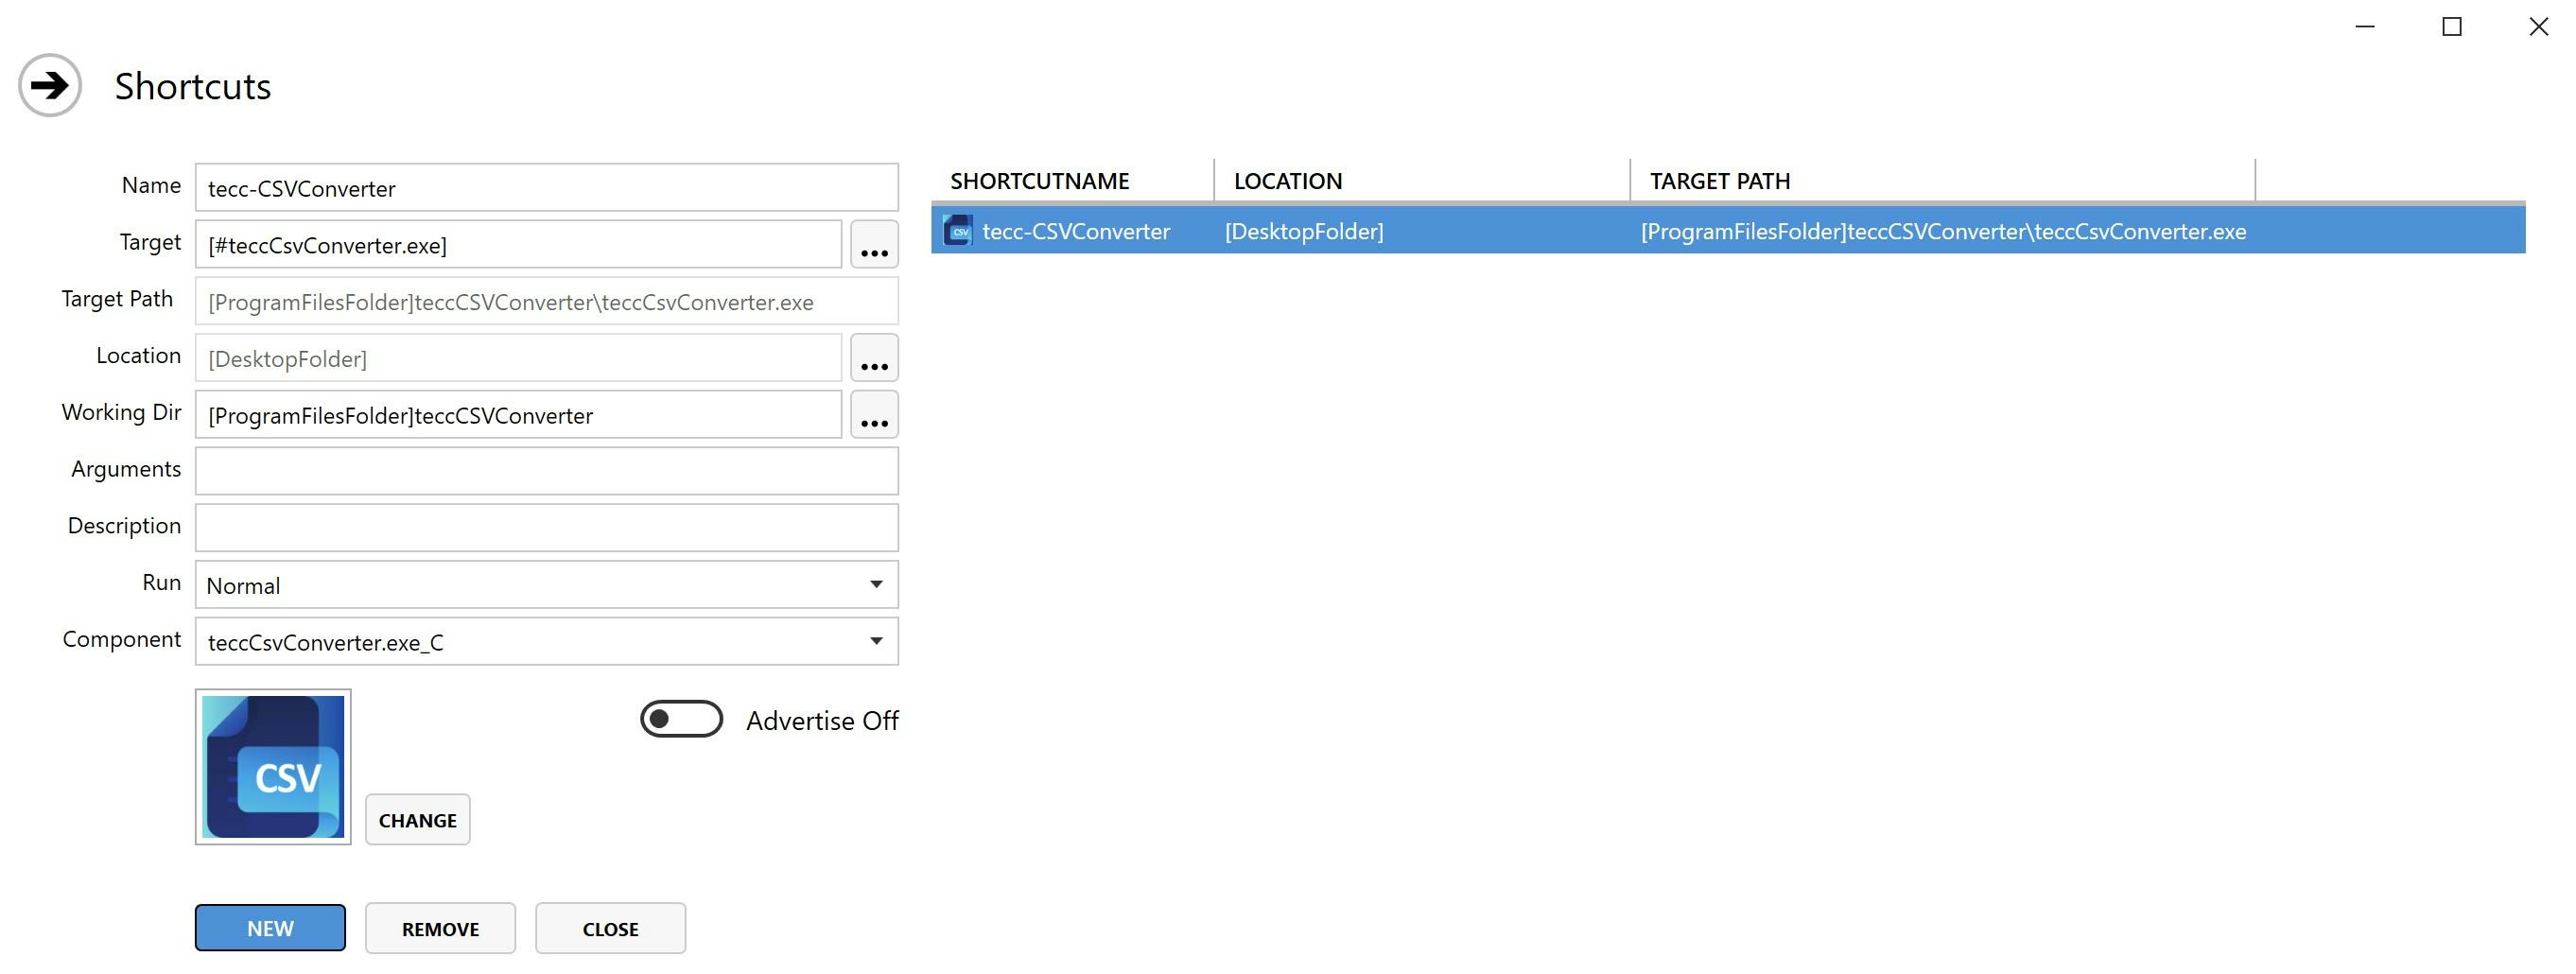
Settings for PackageManager
We need to create a new MSI:
Please do not be confused by the numerous settings. The settings about version, manufacturer, authors etc. can be maintained for your own better organization, but they have no effect on the MSIX to be created later, which these settings will overwrite. Basically, there are only 2 things to do:
The folder (in this case teccCSVConter) must be copied to "Programs" and
a shortcut with the "Icon" must be created for the exe in this folder. After that, the MSI needs to be built and saved.

This is how it appears to me. Feel free to experiment with the program. It has a somewhat unconventional interface, but it's not too difficult to become accustomed to it. Also, please be aware that there is no need to sign this MSI with your certificate.
Add your directory with the files into the ProgramFilesFolder

Create at least a desktop shortcut
Testing our MSI
Once you have your MSI file, you should execute and test it. If you'll get a Desktop icon and a double click will start your application, you should be good to proceed. Please don't forget to uninstall your app, as you need a "clean" PC before running the MSIX Packaging Tool.
Microsoft Partner Portal
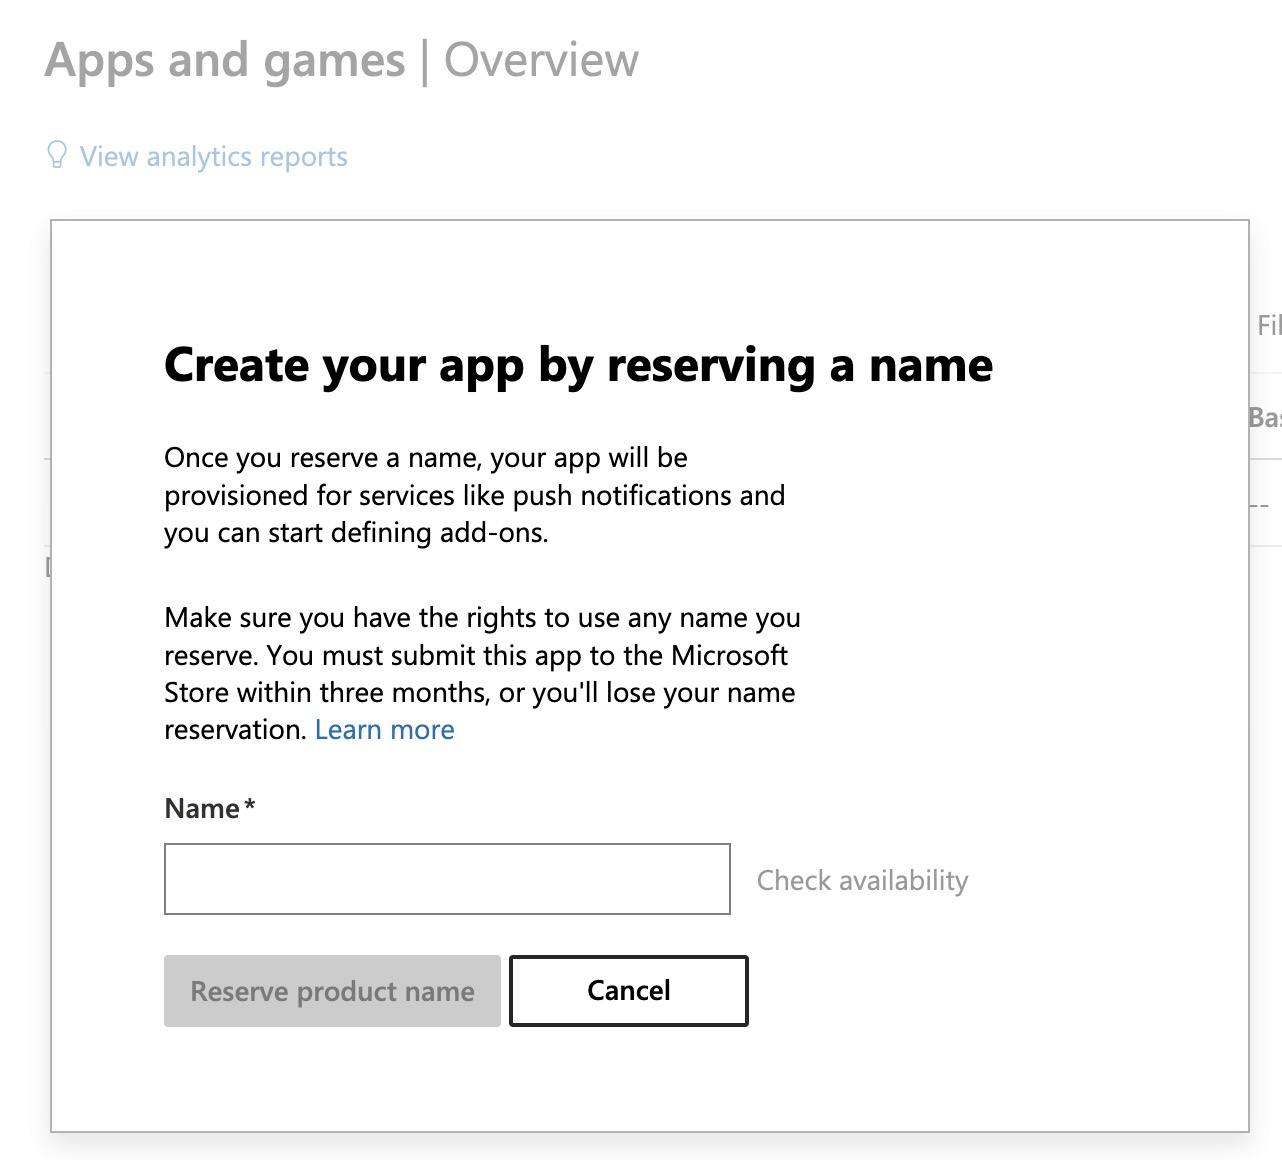
If we want to create our application for the first time, it is essential to first establish our application in the Microsoft Partner Portal. Only through this process will we obtain the necessary metadata that we will undoubtedly need later.
You must create a "New Product". Please select the MSIX app and then follow all the necessary steps.
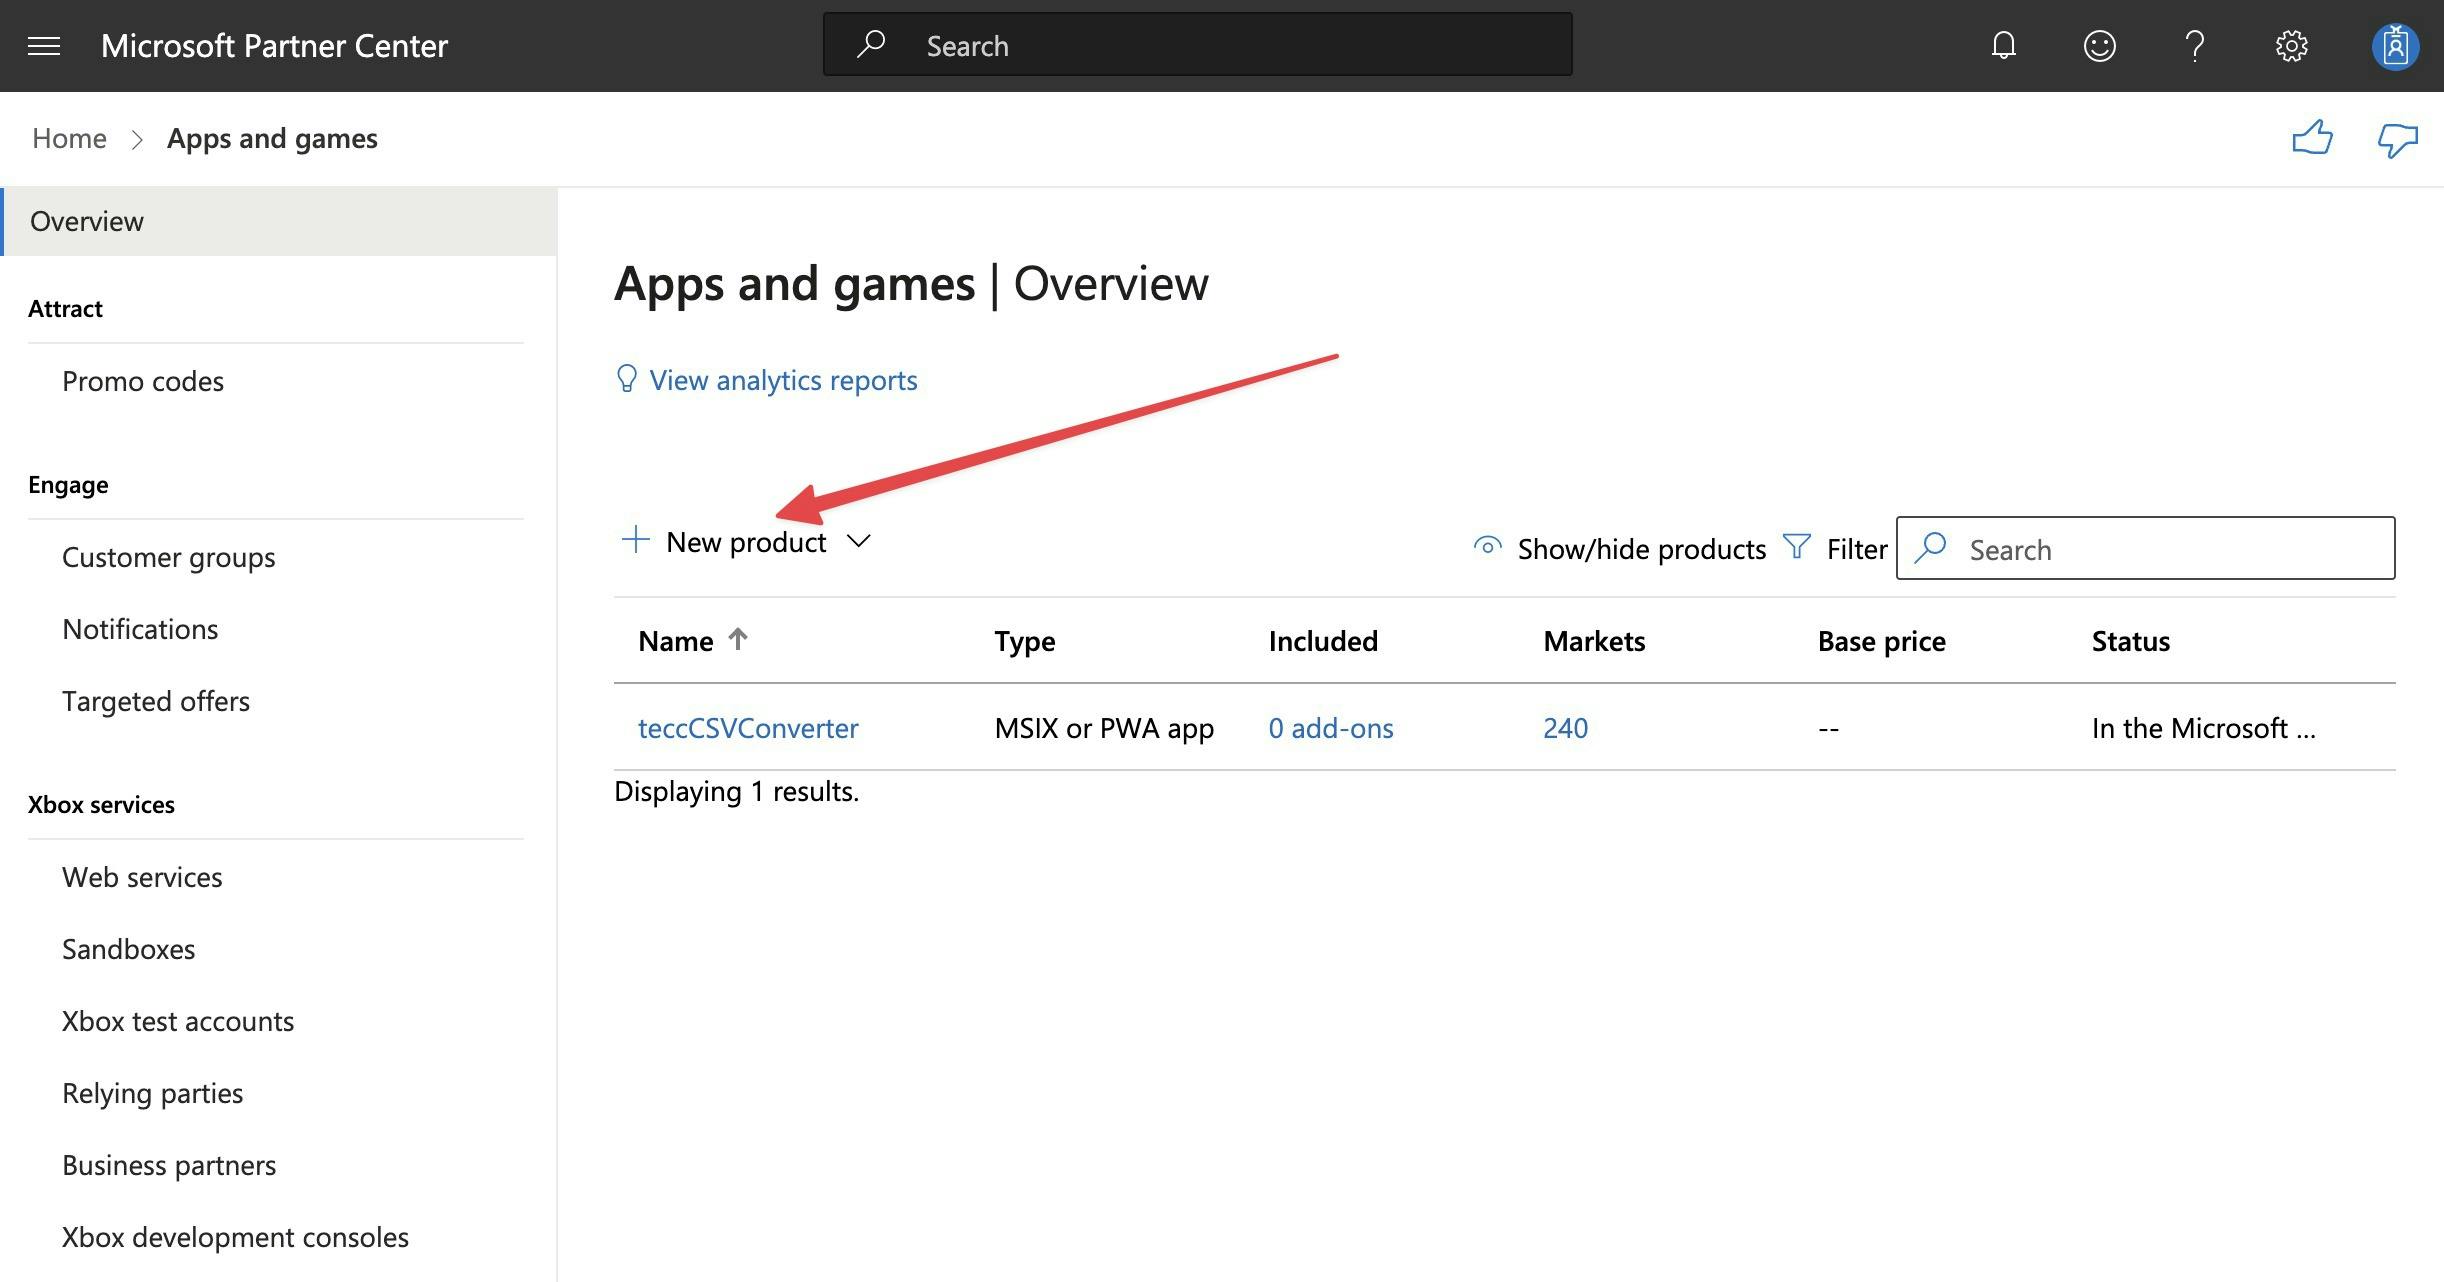
This process is straightforward and quite similar to processes found in the Apple App Store. In the rest of the tutorials, we will only point you to the "must-know" information for building a correct MSIX package.
You can follow any YouTube tutorial or consult Microsoft Help for additional information on working with the Microsoft Partner Portal.
Creating an MSIX Package with the MSIX Packaging Tool
Now, we are finally ready to use our MSI file to create the necessary MSIX package. This process is quite simple as well. The only crucial aspect, as mentioned earlier, is that we must sign this package with our certificate, ensuring that Windows 10/11 recognizes it as trustworthy!
This is the sole method to test your app before uploading it to the portal, and you should undoubtedly do this to ensure that everything functions as intended.
Starting the MSIX Packaging Tool
Before we begin, let's go over the upcoming steps to ensure a clear understanding.
First, we will create an MSIX package signed with our local certificate.
Next, we will test this package and verify that our program functions as intended.
Finally, we will modify the MSIX installer to meet all the upload requirements.
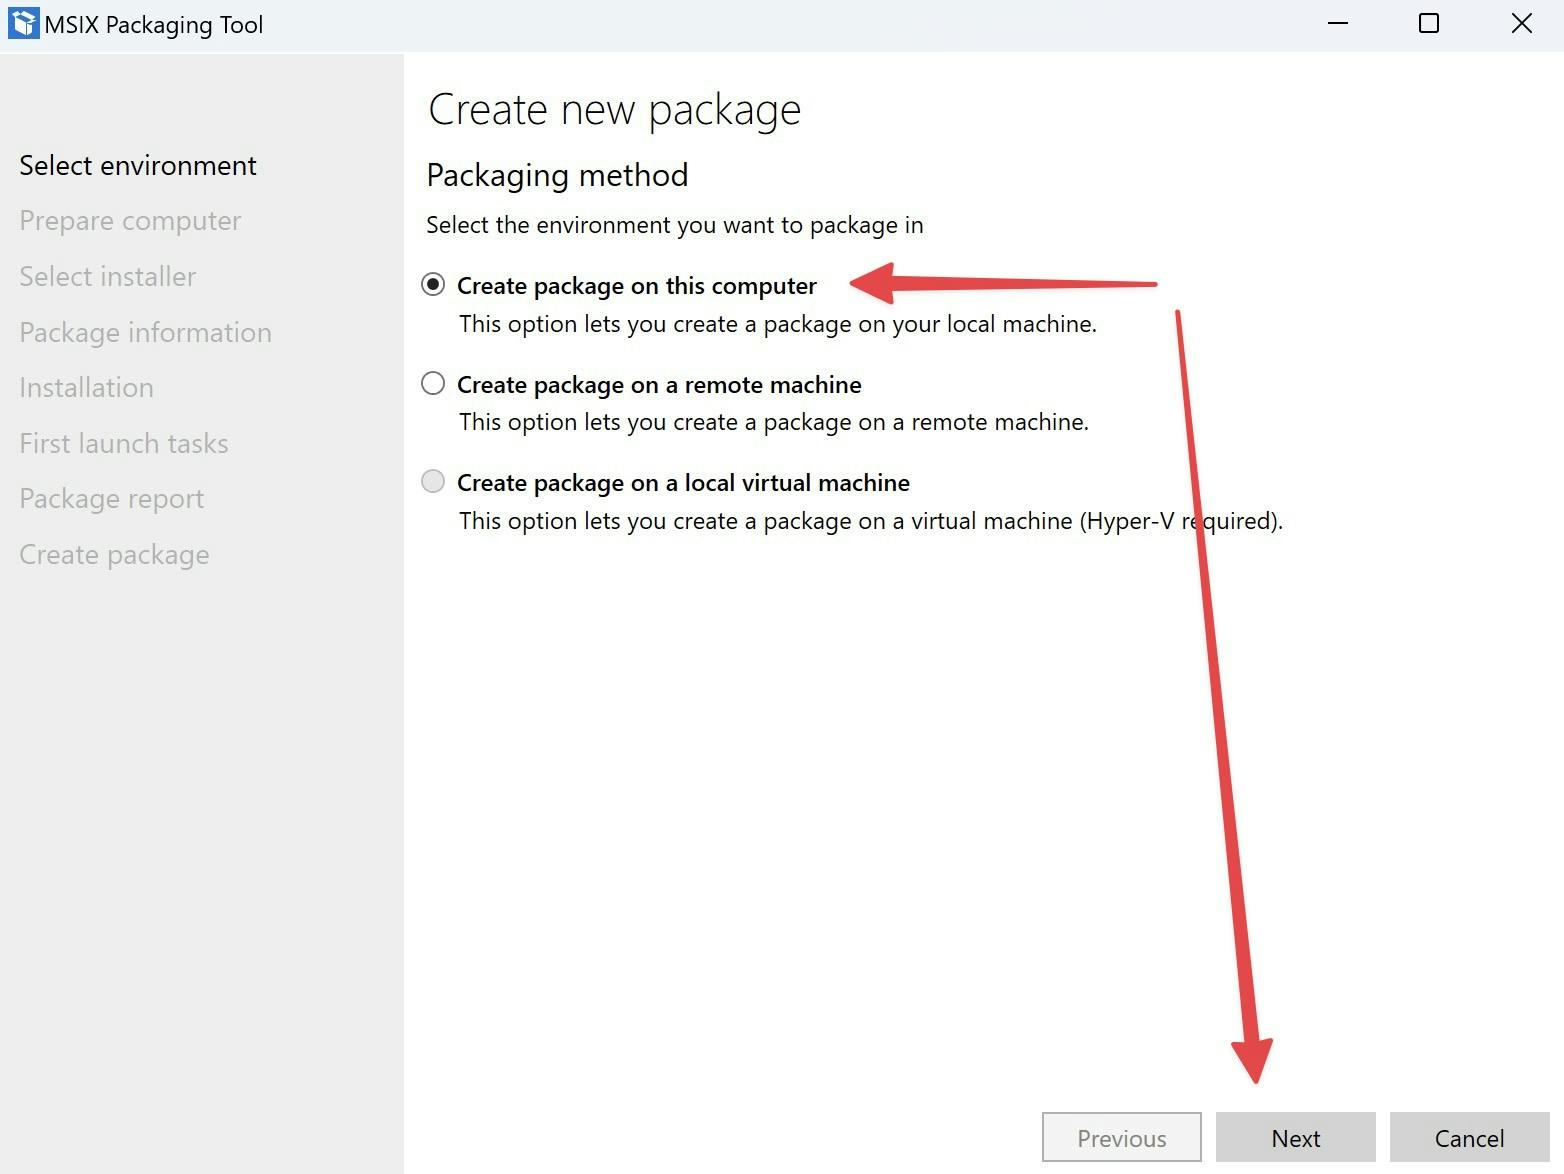
Creating a new MSIX Package
First, we need to create a new package. Please be aware that you must install the "MSIX Packaging Tool Driver." To do this, first add this feature under Settings > Apps > ...
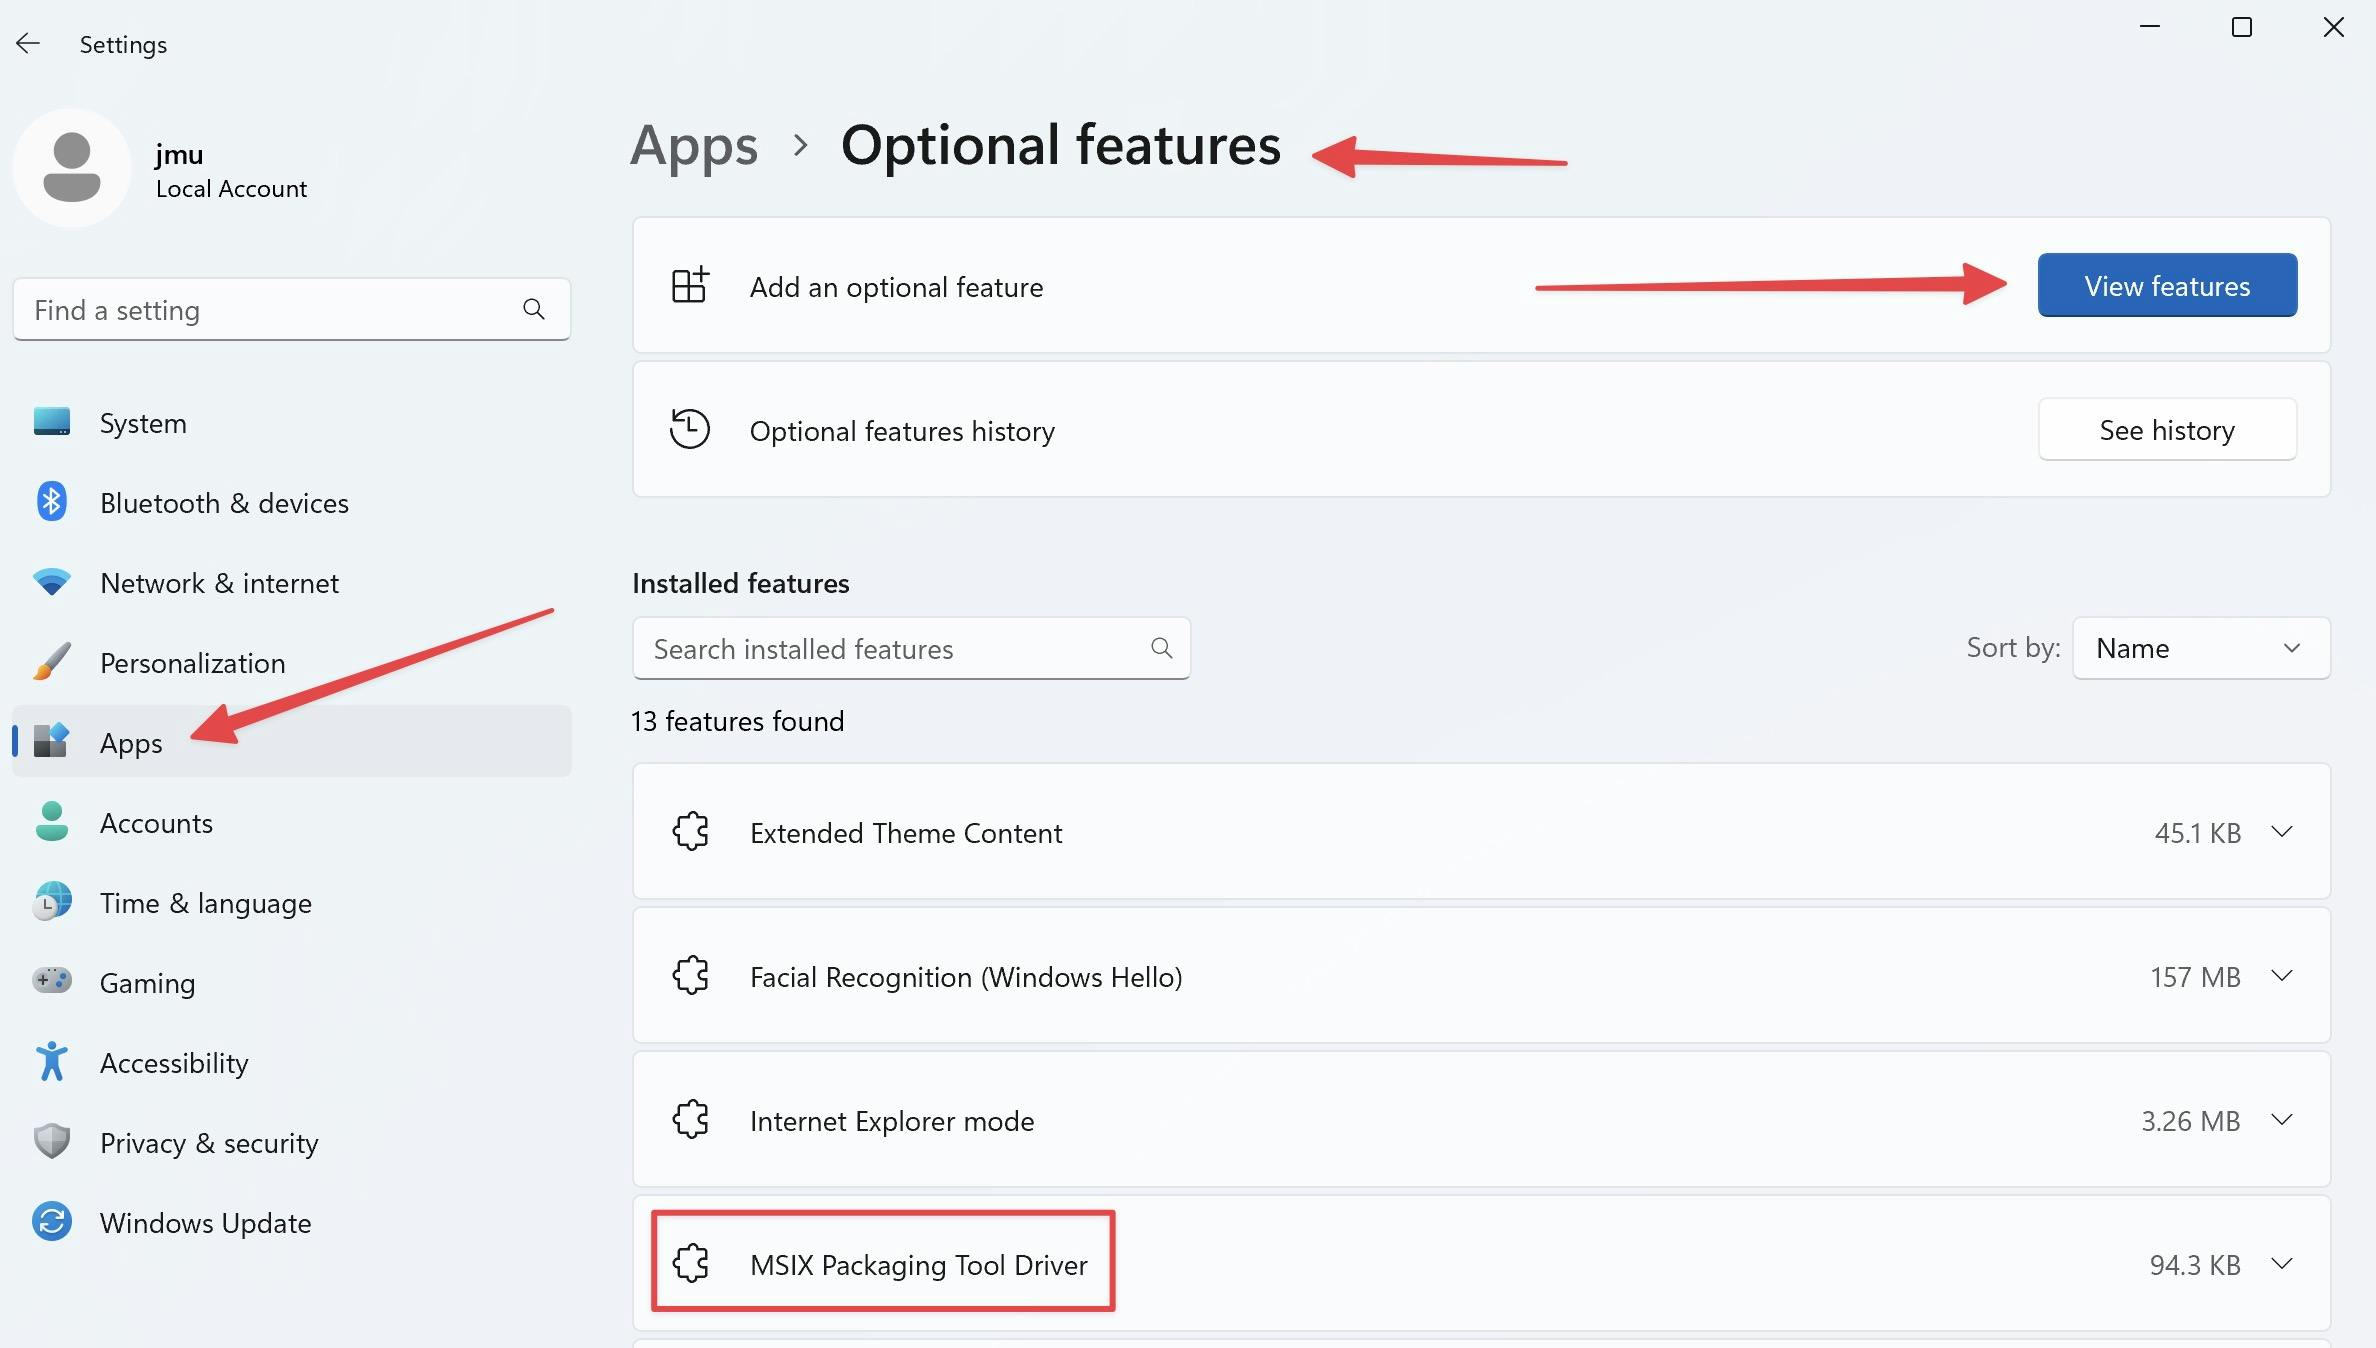
Once you have installed this driver, the MSIX Packaging Tool will launch without any errors or warnings.

Click "Create package on this computer" and continue.
As the MSIX Packaging Tool relies on an initial clean snapshot, you may encounter various warnings that need to be resolved before proceeding. Often, you'll be prompted to restart your computer, which typically occurs when another app or the operating system has installed updates just prior. This is one reason why I recommend using a virtual machine with as few programs installed as possible. Additionally, you should definitely turn off any messenger software, among other things.
Choose your MSI file and the previously created certificate.

Place here your previously created MSI file
Please select "Sign with a certificate (.pfx)
In my case, the screen will look like his.
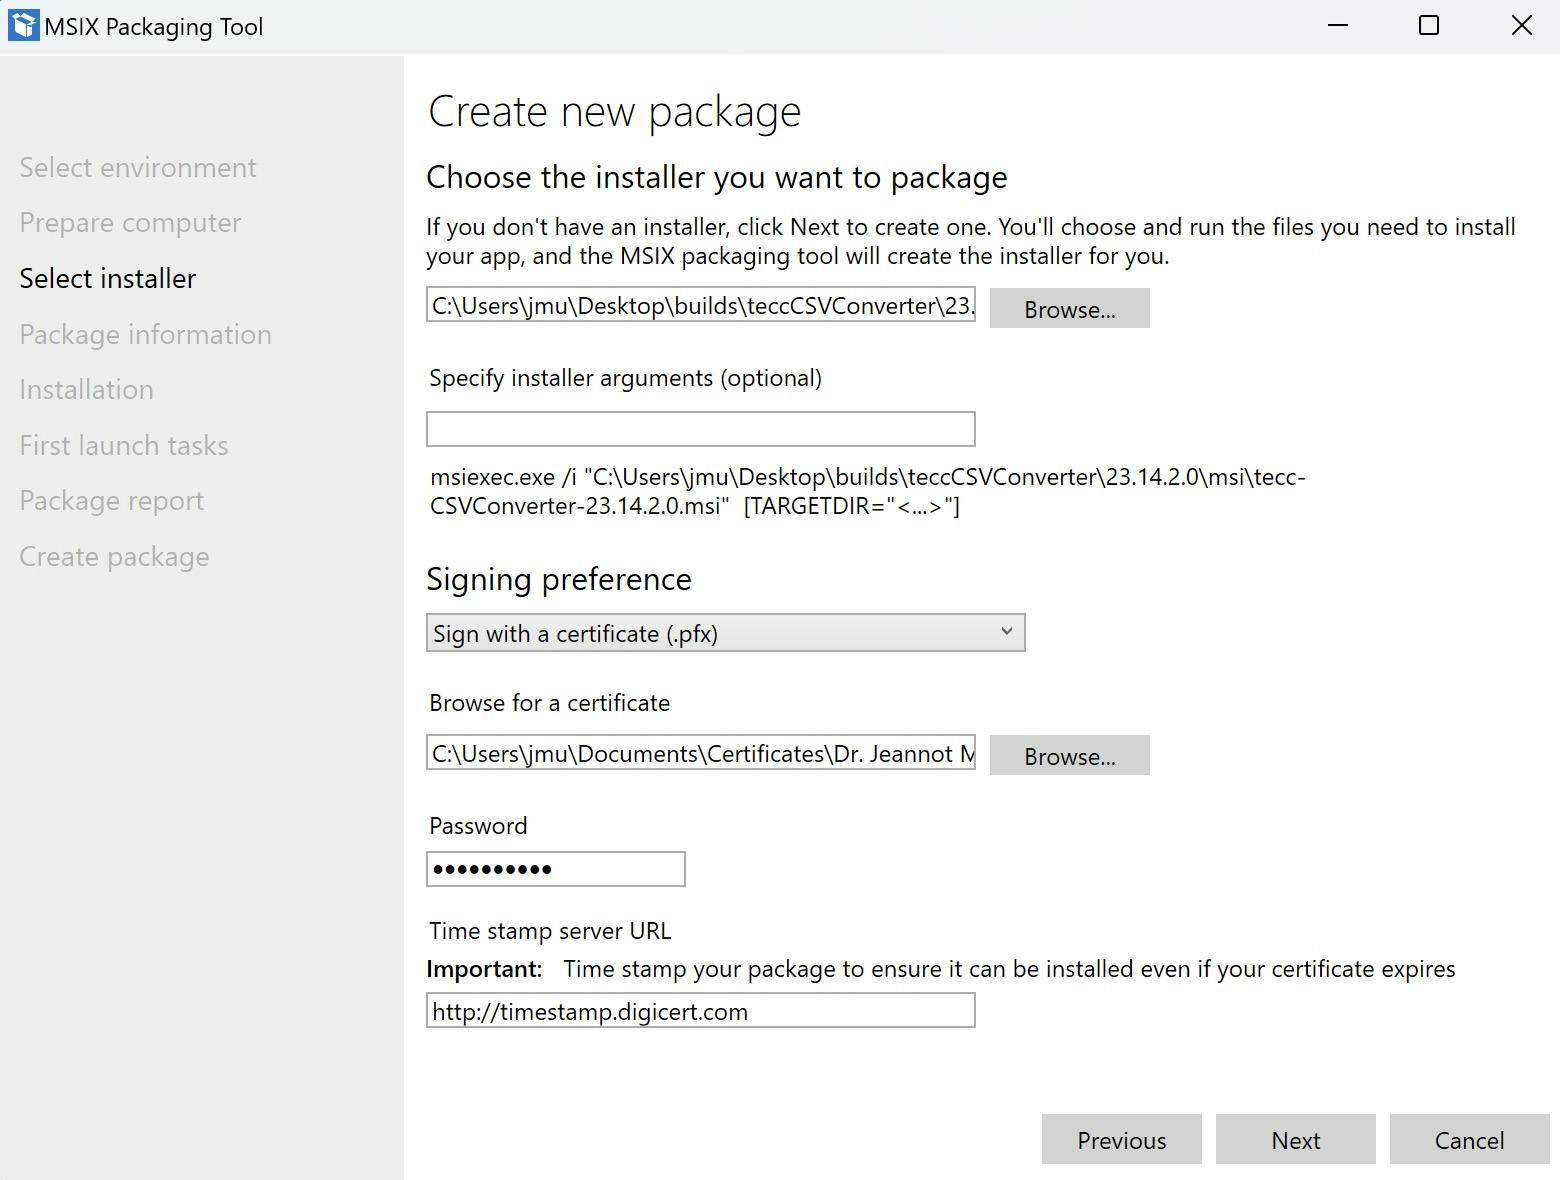
The time stamp server should be optional, but it doesn't hurt to use one.
Run your installer via the MSIX Packaging Tool
Once you have clicked the "NEXT"-Button your MSI installer will start running, and the MSIX Packaging Tool will record all changes made by your installer. Please wait until you'll see the following screen:

For JavaFX there is usually no need to restart your machine, just click the "NEXT"-Button and wait for the next screen.
Now we are almost done. You should see your exe file and it is important that you start it once by clicking on the "RUN"-Button.
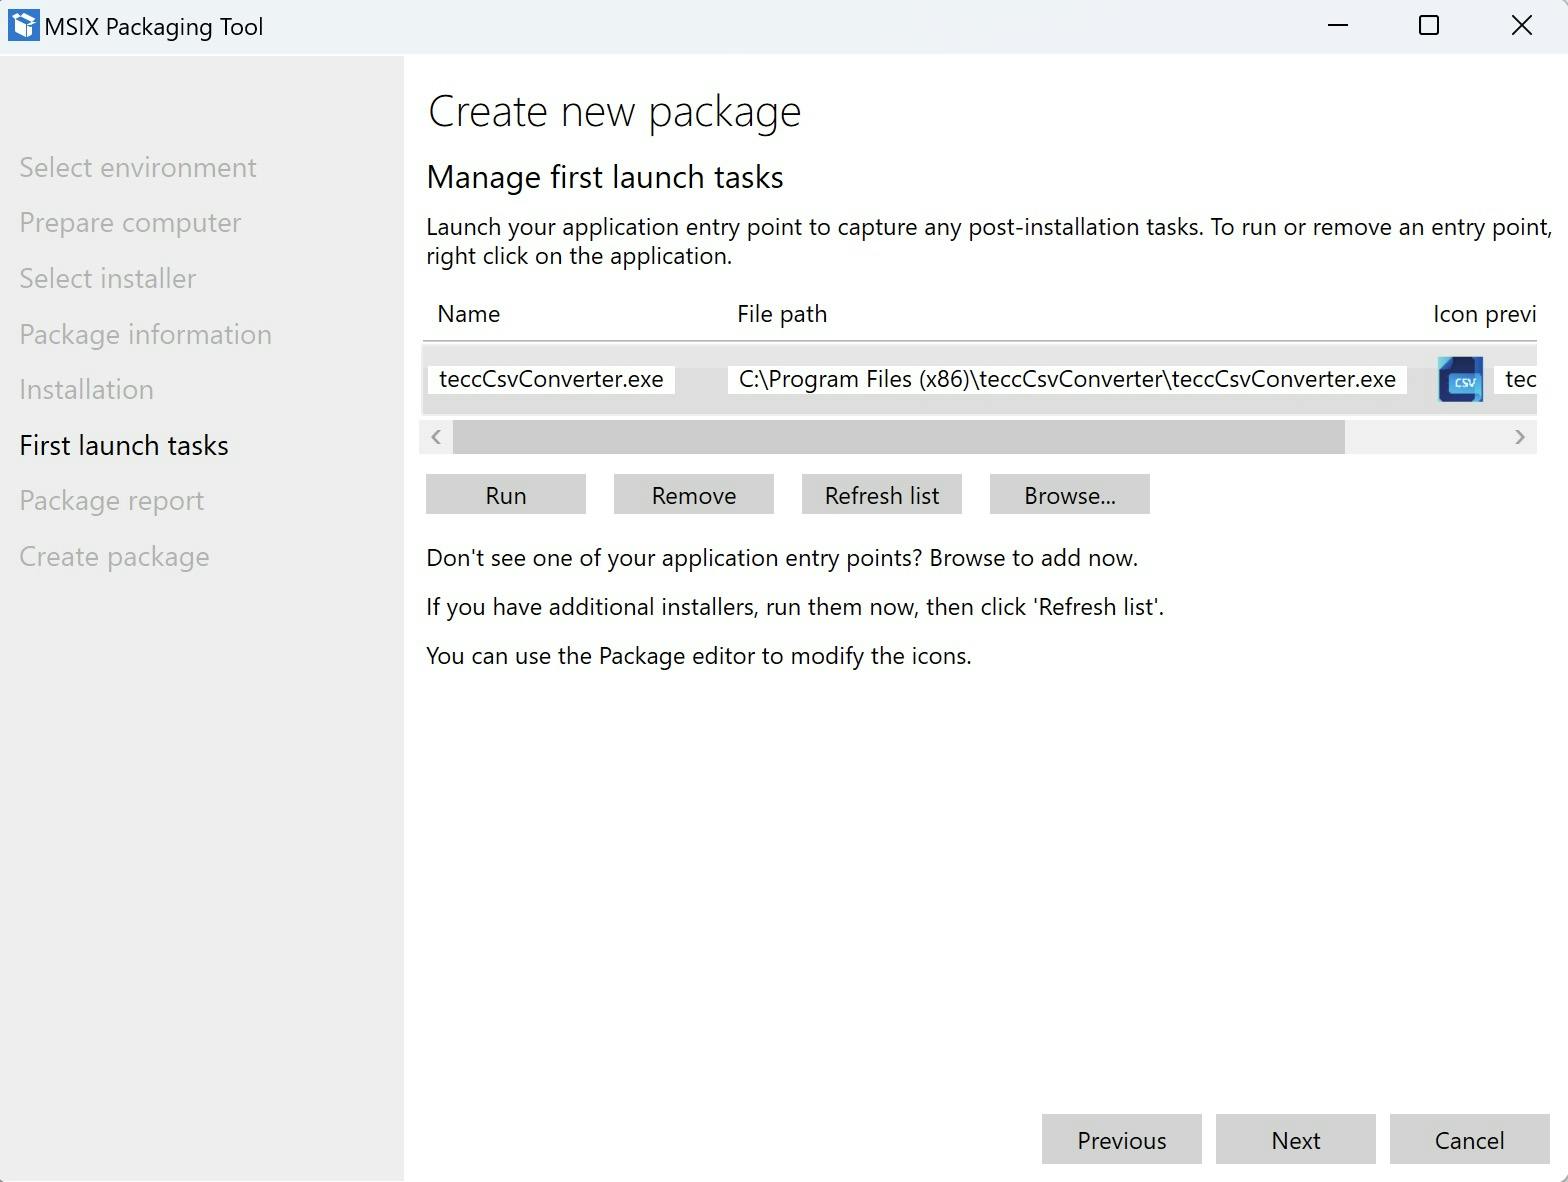
Note: Please be aware that the MSIX Packaging Tool will continue to "record" your activities. We are not done yet; if, for instance, you change settings in your app now, those changes will also be recorded. I typically open the app and close it immediately.
We are almost done!
For a typical JavaFX application, we are now finished, and you should click on "YES, MOVE ON."

Pre-final screen
For a typical JavaFX Application, we should not see any "detected service". Click the button "NEXT" to continue.

We are done!
We've reached the final step! All you need to do is select a location to save your MSIX package, click the "CREATE" button, and you're finished.

Testing our MSIX Package
I cannot emphasize enough the importance of testing. We should now run our package and see if the installation works at all. Various error messages may appear at this stage, which, of course, go beyond the scope of this tutorial.
Before testing the MSIX package, it is good practice to uninstall the program created by the MSI process during packaging. Although MSIX packages run in their own virtual environment, making parallel installation possible, it is cleaner and less confusing to uninstall the application before testing.
This is likely an ideal time to learn more about MSIX packages:
The crucial thing to understand is that we now have an MSIX package signed with a local certificate for this computer, and it only works on this computer. However, it is essential to test the installation because if it doesn't work on the local machine, it certainly won't work in the Windows Store, and Microsoft's approval will be halted. Since the release process from Microsoft takes several hours to several days, you would only be wasting time unnecessarily here!
Windows App Certification Kit
As JavaFX applications are encapsulated and the jpackaged executable contains the JVM, the chances are high that you will meet all requirements for the Windows Store. Nevertheless, it is a good idea (especially if your tests above are showing strange behavior) to use the Windows App Certification Kit to check your MSIX package.
Please don't forget that the MSIX Hero application also offers many tools to dive deeper into your created package. Unfortunately, I cannot cover all details in this tutorial, but with both tools, you should be able to identify and solve any issues.
Hints: The drawback of using the Windows App Certification Kit is that you must configure your computer as a "development machine," which involves numerous consequences.
Additionally, you need to install the entire Windows Development SDK. You probably don't want to install this on every Windows machine or virtual machine. For JavaFX, there are typically not many issues; the classic one is that your shortcut to run the executable isn't working properly. In other words, if running the MSIX Package results in a functioning app and its icon appearing in the search for your app, it should be an indicator that everything will work.Please note that both the Wix Installer and the MSI generator from jPackage are causing issues for the MSIX Packaging Tool to recognize the icon. That's why I recommend the above approach to create your own MSI using the MasterPackager!
- The Windows Store will display the exact same issues in case of any exceptions that you would encounter with the Windows App Certification Kit. So, if you don't mind being rejected and don't want to convert your Windows PC into a developer machine, simply wait for feedback from the Microsoft Windows Store Certification.*
Converting our "local" MSIX to one compatible with the Windows Store.
We have successfully created a functional MSIX package; however, upon uploading it to the Windows Store, it will be instantly rejected due to incorrect metadata.
To rectify this, we must open the MSIX file using the MSIX Packaging Tool.

Please select the "Package Editor" and open the created MSIX package (not the MSI file!)

Upon opening, you will see the parameters of your package:

It is crucial not to unpack this file. Make the necessary changes, and once completed, simply save your file! Points 1-5 must correspond to the specifications from the Microsoft Partner Portal and must now be adjusted accordingly. Number 6, "Package Description," should include any relevant information to adequately describe this package in the future. Please refrain from choosing a signing preference. One of the advantages of the Windows Store is that Microsoft handles the signing process!
Synchronizing the settings with the Microsoft Partner Portal
The Microsoft Partner Portal will show the needed metadata for your app under Product Management / Product Identity as shown below.

My settings will look like this:

As you can see, the fields must correspond exactly to the entries from the Partner Portal.
Please note that the "Publisher name" might appear unusual, but it is essential for Microsoft for being able to sign your application once uploaded. Again, this setting must correspond exactly to the metadata from the portal!
Upon saving, the MSIX Packaging Tool may recommend adjusting or increasing the version number. It's crucial to ensure that the version number matches. In other words, if there's already a version of the application in the store (for example, version 1.2.3.4), a higher version must be used for the next upload (such as version 1.2.3.5, 1.2.4.1, or 1.3.0.0). Please modify the desired value accordingly before saving. If the version number doesn't match, the Microsoft Partner Portal will flag the upload with an error.
Lastly, please note that the MSIX Packaging Tool will generate a unique filename based on your provided metadata. Refer to the following for a clearer understanding:

The file "teccCSVConverter-23.14.2.0.msix" was signed with the local certificate. Any name would be appropriate. After I updated the metadata with the settings from the Microsoft Partner Portal, the new filename created by the MSIX Packaging Tool includes some cryptic elements. Please do not alter this filename, as the Partner Portal will only accept this exact filename.
Final Step
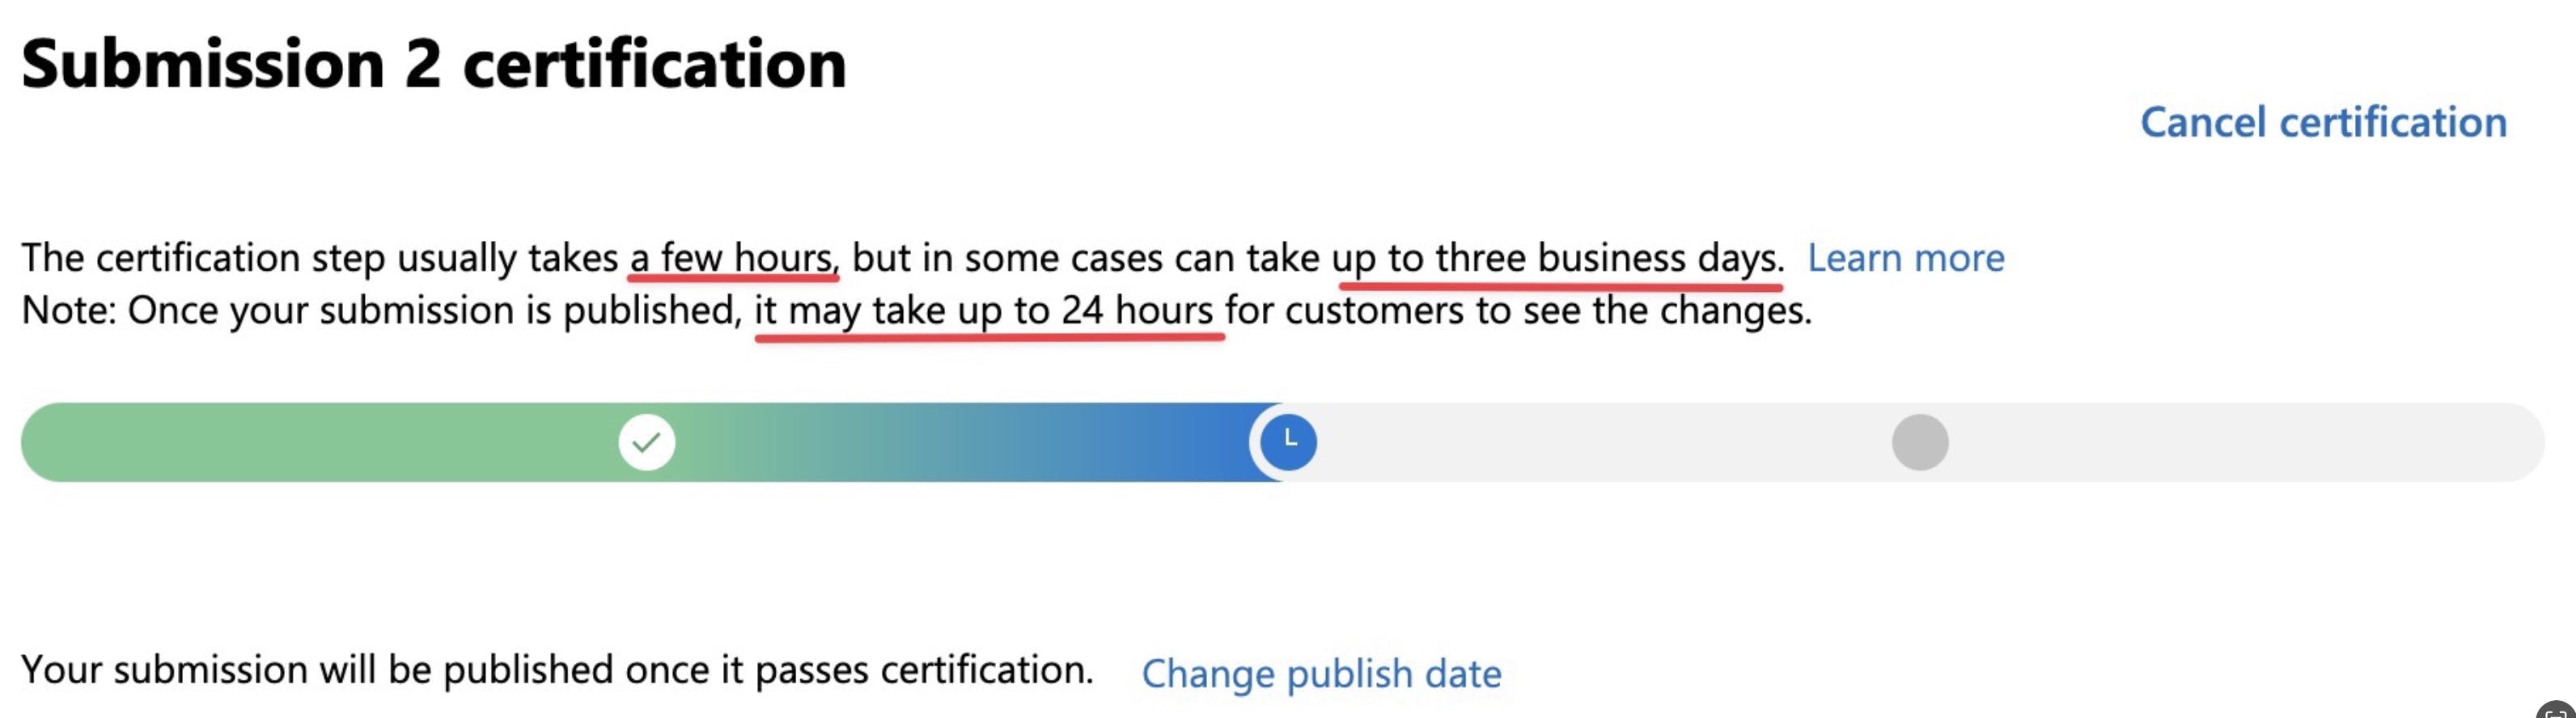
Now nothing should stand in the way of an upload. If everything went well, the Partner Portal will show that the certification has started.
Of course, the mandatory fields that explain the purpose of the application have to be filled in beforehand, screenshots have to be uploaded, etc., but this work is self-explanatory and errors are also pointed out accordingly.
JavaFX specific challenges
This lengthy tutorial might give the impression that the procedure is complicated. In reality, the opposite is true. Once you've gone through the process a few times and established your own workflow, it becomes easy.
I merely lost time due to a "bug" that "normal" Windows developers will never encounter: Out of laziness, I uploaded screenshots from my online help. However, these were created on Apple macOS and displayed the macOS window elements. It's no surprise that Microsoft doesn't want to see such screenshots in its store. Nevertheless, it cost me time because that was the only mistake, and I had to restart the certification process from the beginning.
Please ensure that all screenshots for the Microsoft Store are taken on a Windows computer.
Happy coding & deployment!
